A Step-by-Step Video Workshop

Did You Know You Can Turn a Plain Bathroom Tile Into Floral Art So Striking, No One Believes You Made It Yourself?

It's called alcohol ink. Drop it on a smooth white tile and it blooms into soft petals on its own.

(Even if you've never once thought of yourself as artistic)

A vivid pink and coral alcohol ink flower in a white frame on a kitchen counter

Imagine sitting down at your kitchen table on a quiet afternoon, dropping a single bead of deep blue ink onto a smooth white tile, and watching it spread and feather into petals all on its own, like ink blooming in water.

Imagine reaching for a second color, a warm pink, and seeing it melt into the edges of the first. The two blend into soft veins and shadows you didn't plan and couldn't have drawn if you tried, until an hour later you're standing back thinking, “wait, I made that?”

Imagine that same little flower framed on your wall a week later, and every guest who walks past stopping to ask which artist you bought it from, so you get to smile and say, “actually, I made that one.”

Three groupings of blue, amber, and magenta alcohol inks above three matching finished alcohol ink flowers in blue, amber, and magenta, showing how the inks you choose decide the color of your flower

No Two Flowers Ever Come Out The Same

The exact same blooming method gives you a completely different flower depending on which colors you reach for. Cool blues, soft violets, warm golds. The inks you pick are your palette, and no one else will ever make the one you make.

Alcohol ink flower in cobalt blue and teal on a white tile

Cool Blues

Alcohol ink flower in violet, magenta, and plum on a white tile

Violet & Plum

Alcohol ink flower in warm golden amber and orange on a white tile

Golden Amber

Why It Looks So Impressive, And Is Far Easier Than You'd Guess

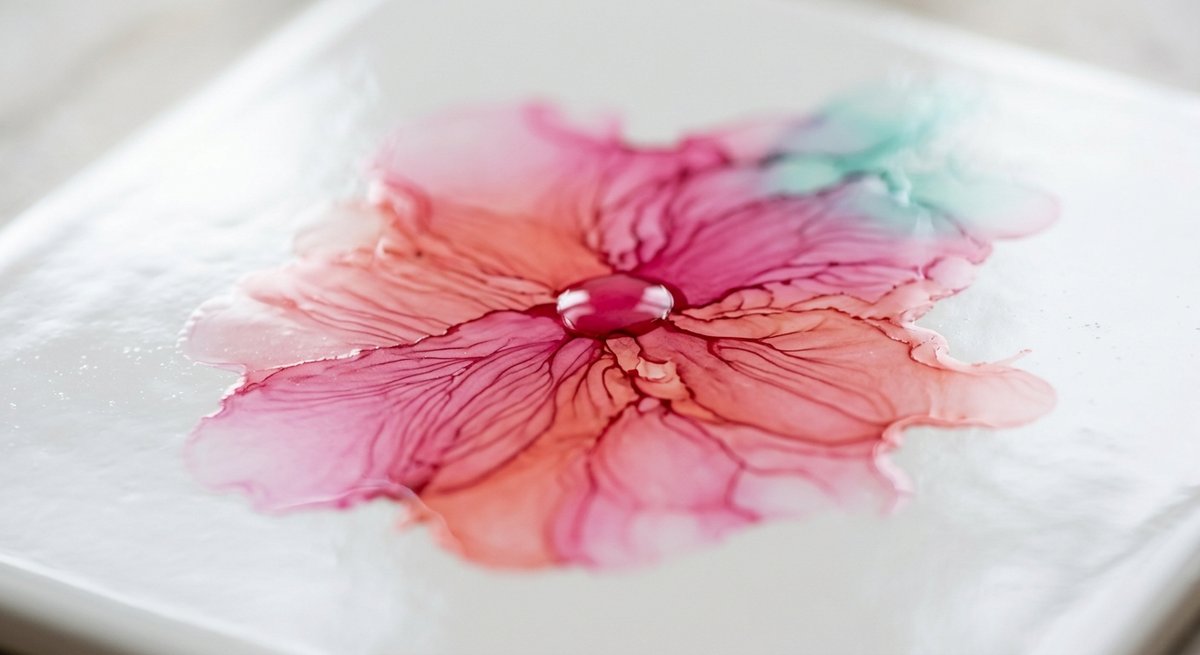
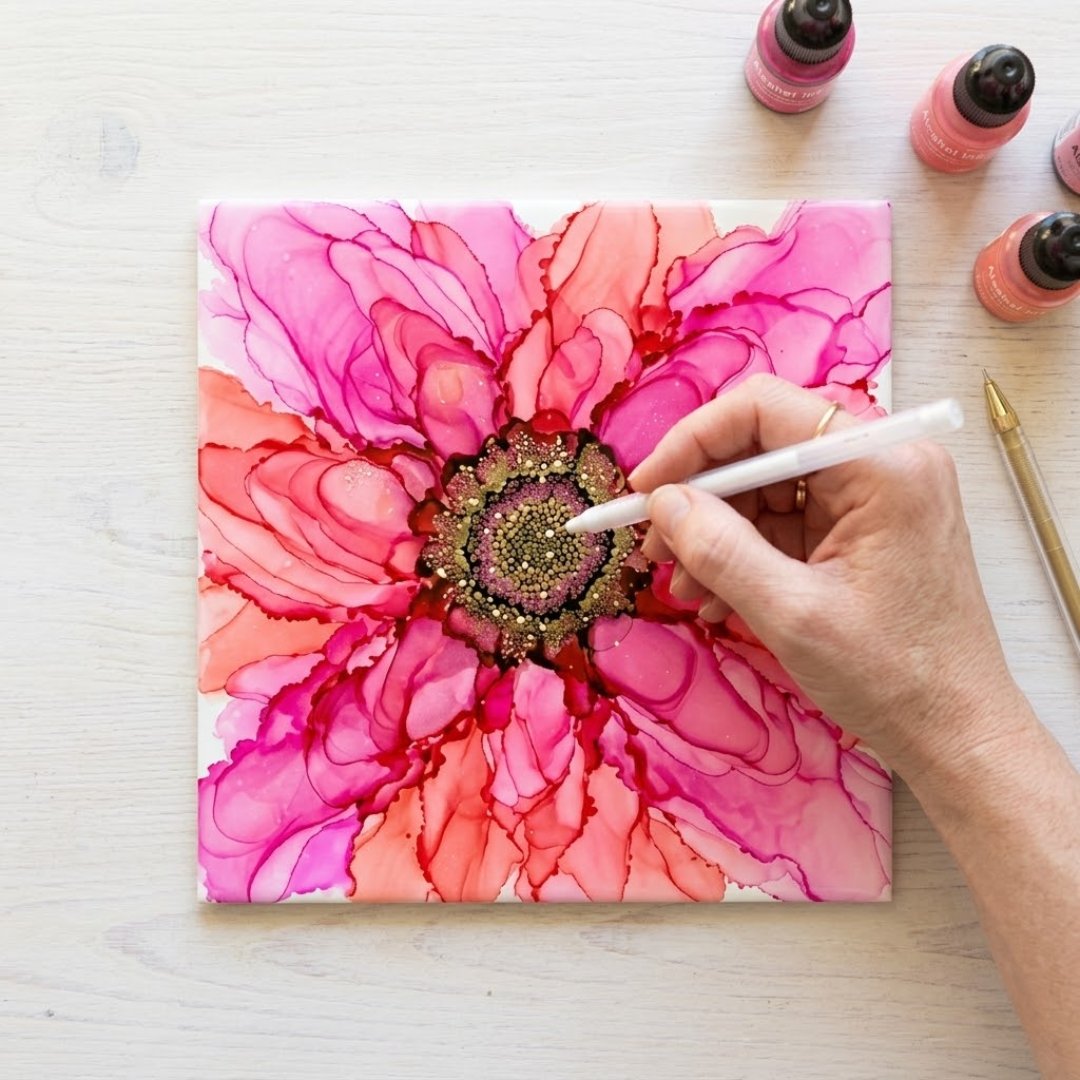
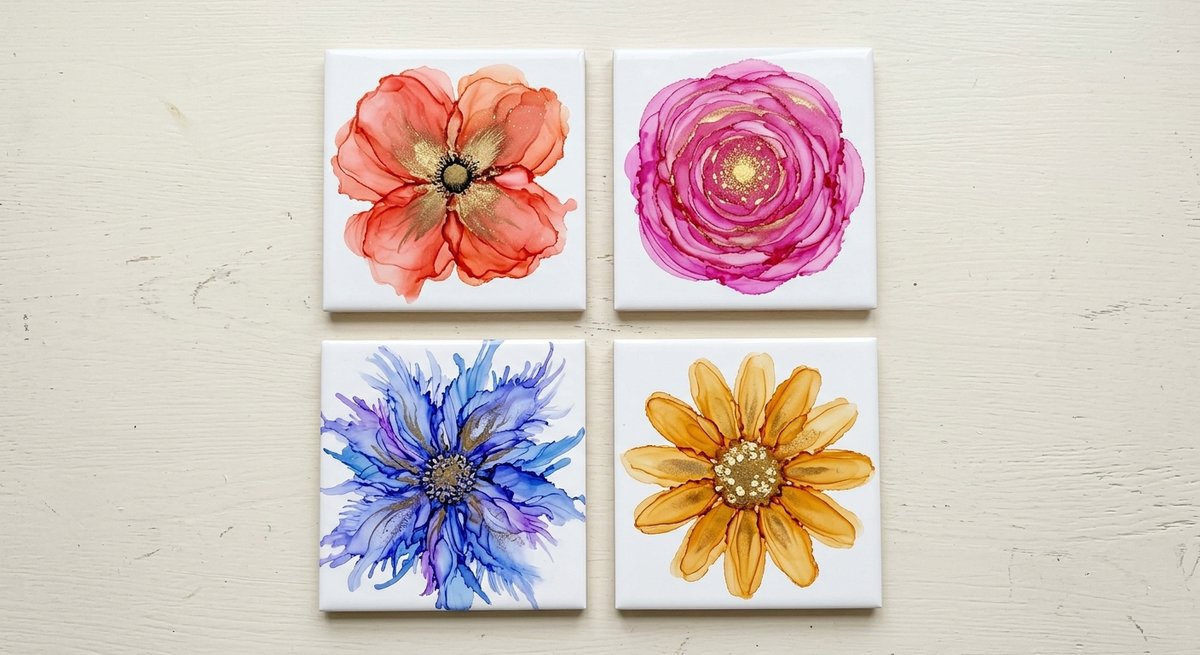
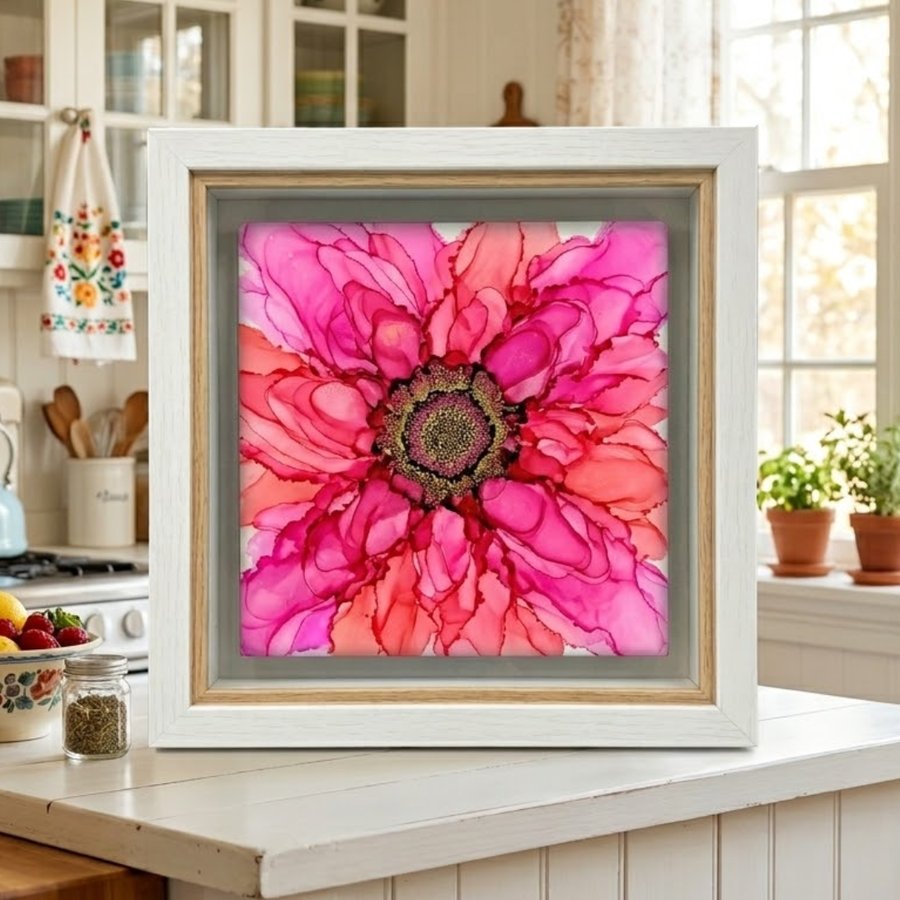
The first time you see an alcohol ink flower, it doesn't look handmade. It looks like a watercolor someone spent years learning to paint. And your first thought is usually, “that's beautiful, but I could never make that.”

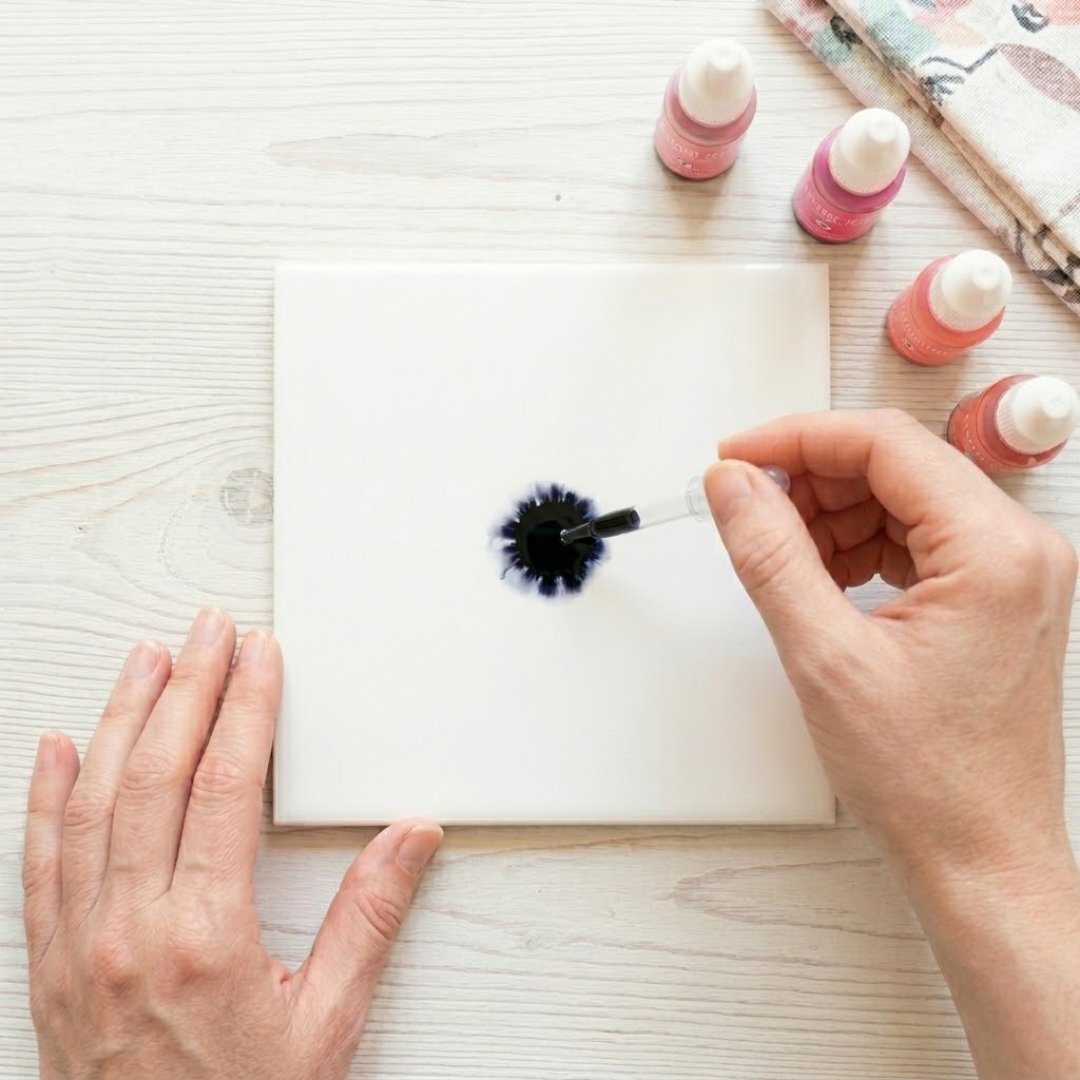
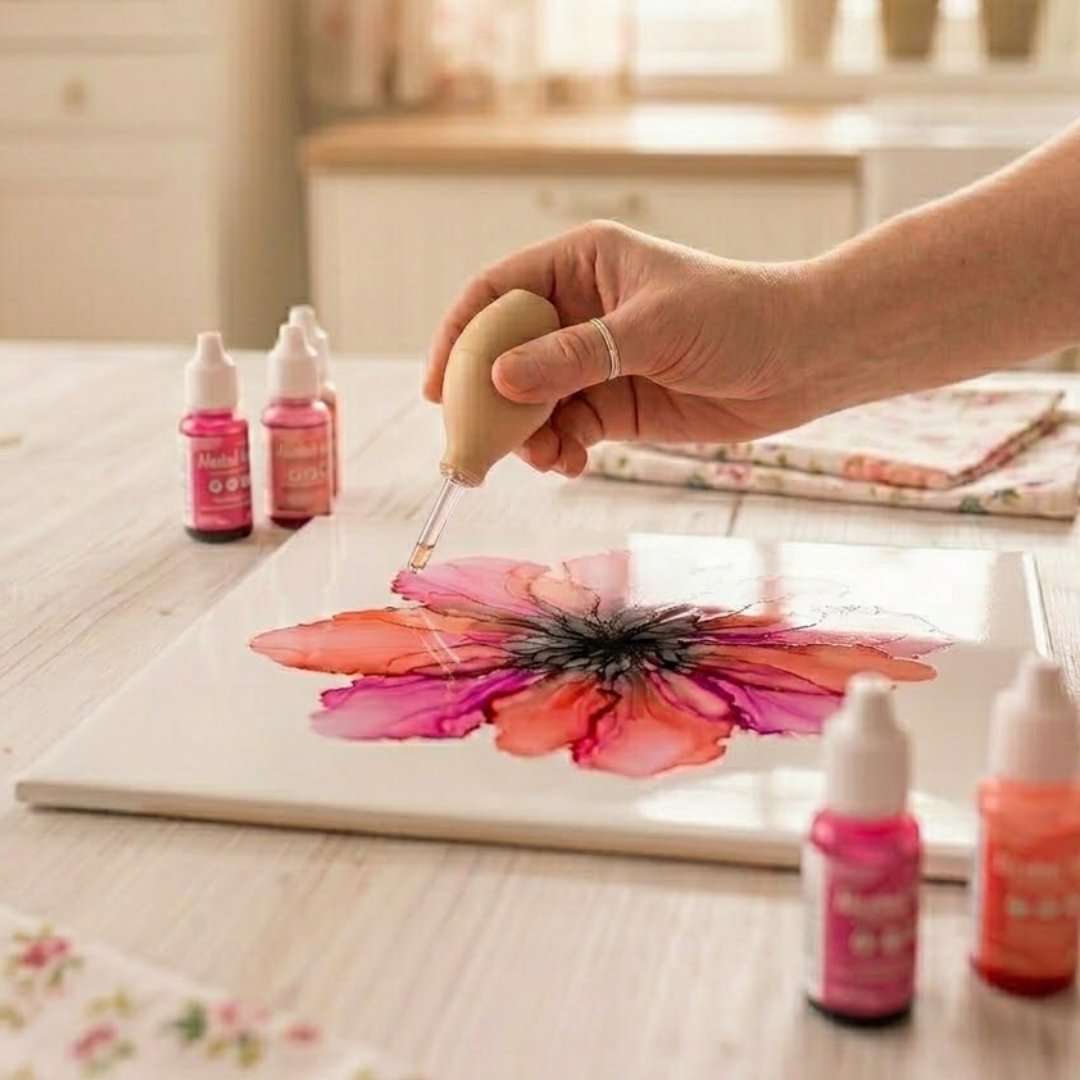
Here's why you can. You're not painting petals. The ink does that part itself. Drop it on a glossy tile and it blooms and feathers on its own, into soft edges no brush could copy. There's no drawing. No steady hand. No “eye for color” you were either born with or you weren't.

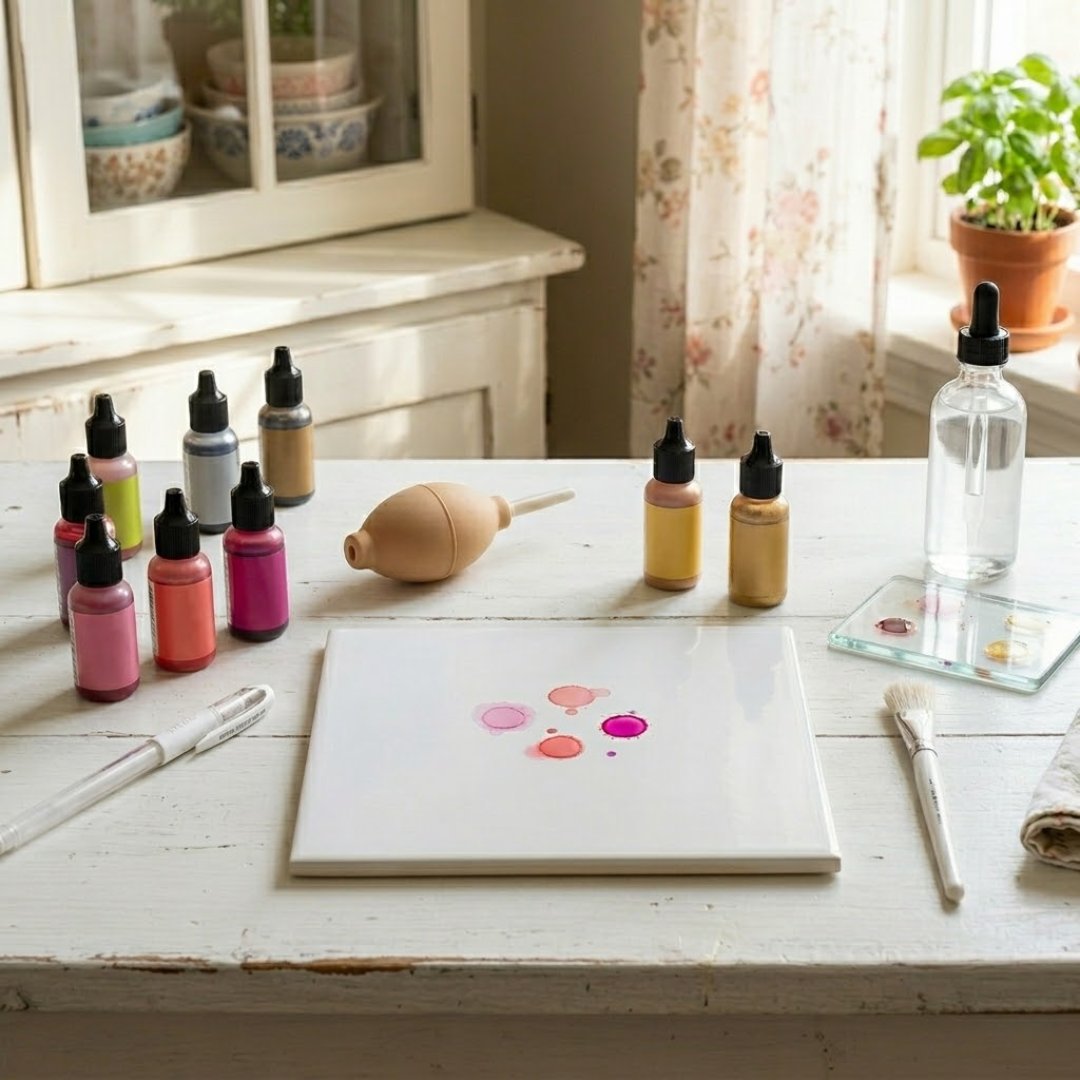
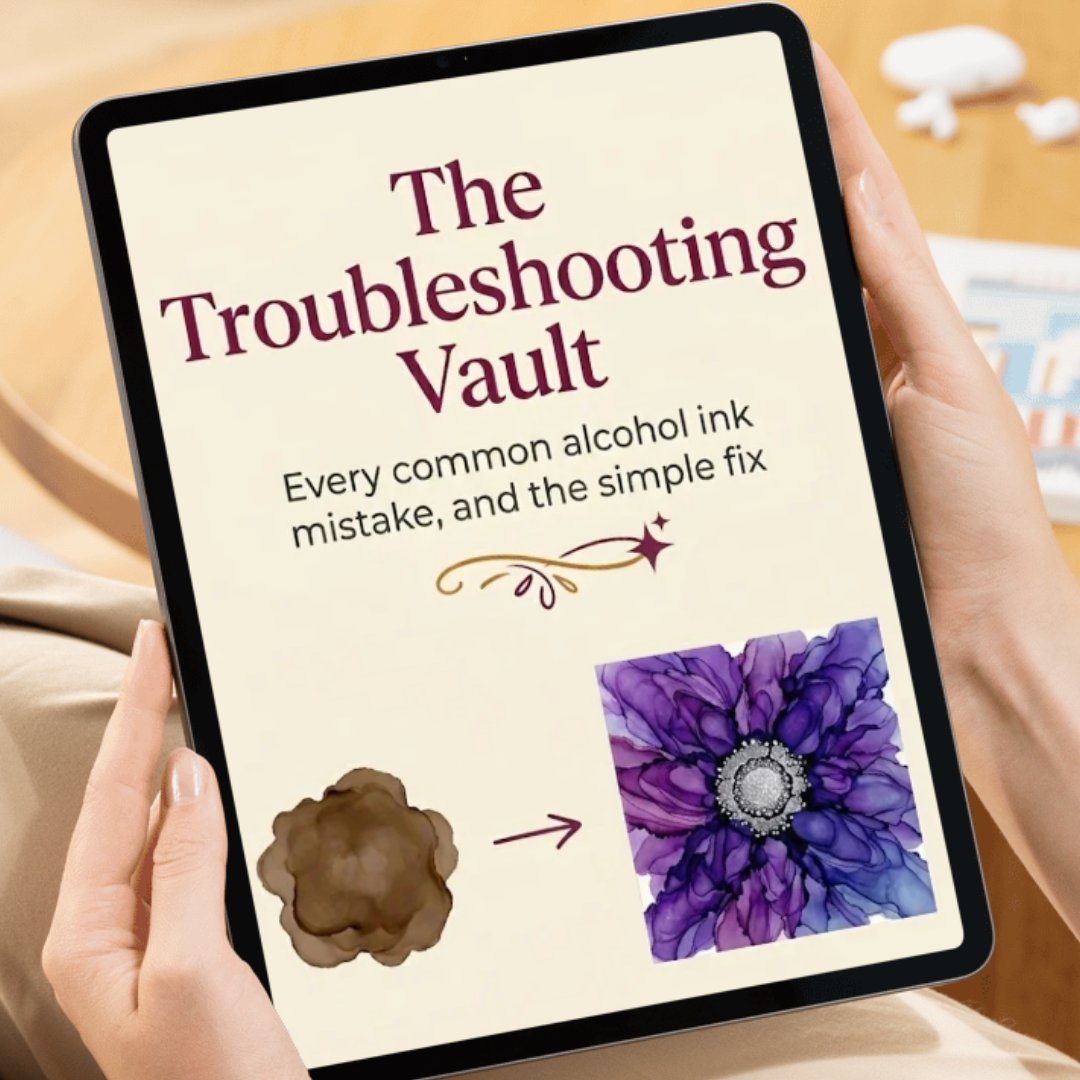
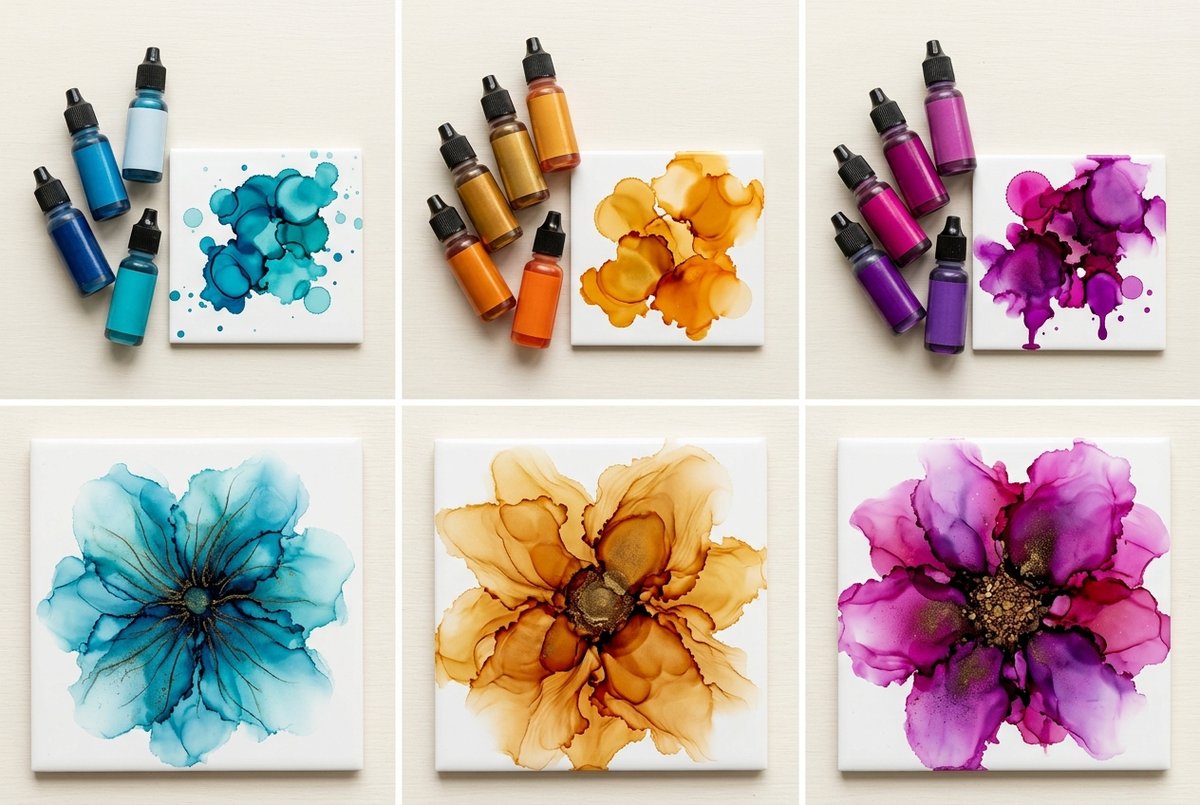
The reason most people's first try turns into a flat brown puddle has nothing to do with talent. It's that nobody told them the three small things that decide whether the ink blooms or muddies: the surface you use, the order you drop your colors, and the one moment you stop touching it and let it settle. Get those right and the flower almost makes itself.

A macro close-up of a single bead of pink and coral alcohol ink feathering into petals on its own on a glossy white tile

Your job isn't to paint the flower. It's to guide ink that already knows how to bloom.

Margot H., the instructor, a silver-haired woman smiling in a garden

Margot H.

Hi, I'm Margot. For thirty-one years I was the librarian at our local elementary school.

I live in a small town in Oregon, in a house with a big kitchen window, and that window is where almost every flower I've ever made got started. Morning light, a cup of tea, a stack of white tiles.

What I love most isn't the finished flowers, pretty as they are. It's the moment someone who swore up and down they “aren't artistic” steps back from their first tile and goes quiet, because they can't believe they made it. If I can give you that moment, the whole workshop has done its job.

Introducing: The Alcohol Ink Flower Workshop

The Alcohol Ink Flower Workshop course preview shown on a tablet, phone, and laptop

This is a complete, step-by-step video workshop that takes you from a blank white tile to a flower you painted yourself in a single afternoon. From there, a few quiet days of curing and sealing (I'll show you exactly how) turn it into a finished, frame-worthy piece. You'll follow along with me in real time, watching exactly where each drop of color goes and why, so there's no guessing and no gaps.

It isn't a theory course or a history lesson. Every module is built around doing. By the time you finish the last one, you'll have a vivid flower drying on your table and the confidence to make as many more as you want, in any colors you like.

And the best part: no two come out the same. The colors you choose, the way the ink decides to spread, the order you drop it in, all of it makes your flower one of a kind. There's no “wrong” palette. There's just your version, and it will look like nothing anyone else has ever made.

What You'll Learn

Five short video modules. Practical, hands-on, zero fluff.

Module 1: an alcohol ink workspace with inks, an air bulb, and a white tile

Module 1

Your Workspace and Your First Blooms

Set up in minutes, understand how the ink behaves, and practice with zero pressure.

  • Why a smooth, glossy tile makes color spread into soft petals while the wrong surface swallows it dull, the single choice most beginners get wrong before they even start
  • How to prep your tile in seconds by wiping it down with isopropyl alcohol first, so the surface is clean and grease-free and the ink spreads evenly instead of beading up
  • The three quiet levers behind every good result, surface, color order, and timing, and how knowing them turns “random” into something you can repeat
  • The no-waste practice trick that lets you rehearse every move on one tile, wiping it clean and starting fresh as many times as you like, so you build a steady hand before your real piece
Module 2: a hand placing the dark center dot of an alcohol ink flower on a white tile

Module 2

The Heart of the Flower

Lay your center and build your first full ring of petals.

  • Why every flower starts with a single black dot in the dead center, and why letting it dry before you add color sets up everything that follows
  • The drop-of-alcohol-on-top move that turns a plain bead of ink into a soft, feathered petal in seconds
  • How to steer each petal outward with a simple air bulb, so a complete ring forms around the center exactly where you want it
Module 3: a hand using an air bulb to push alcohol ink into petals on a tile

Module 3

Building a Full, Dimensional Flower

Layer petals and color for depth, without the dreaded muddy brown.

  • The second-pass technique that fills the gaps between your first petals and takes the flower from sparse to lush and lifelike
  • How layering a second and third color builds soft depth and shadow, instead of blending into the brown sludge that stops most beginners cold
  • The exact moment to set the bulb down and stop touching it, the timing secret that keeps every color vivid and separate
  • How to fill the negative space around your petals with a touch of green ink for leaves and foliage, so the flower feels grounded instead of floating on a bare tile
Module 4: a hand stippling fine light dots into the center of a pink alcohol ink flower with a gel pen

Module 4

The Finishing Touches That Make It Look Professional

Build the dense, detailed center that turns a nice flower into a finished piece of art.

  • How the black center you started with becomes the heart of the whole flower, and why a strong, dark center is what makes the petals around it pop
  • The patient white gel-pen stippling method, placing dot after dot inside the black center, letting them dry, and building up in layers until it reads as a rich, textured heart instead of a flat dot
  • The hardest beginner skill of all, knowing the exact moment the center is complete, so you stop before you overwork it
Module 5: a hand spraying sealer over a finished pink alcohol ink flower tile

Module 5

Sealing and Protecting Your Finished Flower

Cure, seal, and protect your finished piece so the colors stay rich and it's ready to frame or hang.

  • Why you let the finished tile cure for two to three days before you seal it, and how rushing that one wait can quietly ruin the whole piece
  • Why a spray sealer beats a brush every single time, since a brush lifts and smears the ink you just laid down
  • The three-coat spray method that locks in your colors with no drips or cloudy patches, the two-day set it needs afterward before it's ready to hang, and the one display tip (keep it out of direct sunlight) that protects alcohol ink from fading

4 Free Bonuses (Included Today)

FREE Bonus Bonus 1: The Gallery-Ready Framing and Display Guide on a tablet

$19 Value. Yours FREE

The Gallery-Ready Framing and Display Guide

Turn your finished tile into a piece that looks like it belongs on a gallery wall.

  • The shadow-box framing approach that gives a simple tile that deep, expensive, “where did you buy this?” look, for less than the price of a takeout dinner
  • Three ways to display a tile beyond framing, from floating mounts to a small easel on a shelf, so your piece fits whatever spot you have in mind
  • The one mounting mistake that makes a beautiful tile look amateur, and the thirty-second fix that avoids it
FREE Bonus Bonus 2: The Color Palette Library on a tablet

$23 Value. Yours FREE

The Color Palette Library

Never stare at a blank tile wondering which colors go together.

  • A set of proven color pairings that always bloom beautifully, so you skip the trial and error
  • Which color combinations quietly turn to mud the moment they touch, and the simple rule for knowing before you drop a single bead
  • How to build a palette around a room or a feeling, so every flower you make actually belongs where you plan to hang it
FREE Bonus Bonus 3: The Troubleshooting Vault on a tablet

$15 Value. Yours FREE

The Troubleshooting Vault

The “what went wrong and how to fix it” guide for every beginner hiccup.

  • The fastest fixes for the four most common stumbles, muddy centers, petals that won't spread, ink that dries too fast, and cloudy sealer, each one solved in a sentence
  • Why most “ruined” tiles aren't ruined at all, and the wipe-and-rescue move that saves a piece you were about to toss
  • The quiet warning signs that tell you something's about to go wrong, so you can catch it before it does instead of after
FREE Bonus Bonus 4: The Flower Variations Pack, four different alcohol ink flower shapes on tiles

$37 Value. Yours FREE

The Flower Variations Pack

Once you've made your first flower, you'll want a whole collection. This shows you how.

  • Quick-start guides for three more flower shapes beyond your first, a loose poppy, a round clustered bloom, and a spiky wildflower, all built from the exact same skills you already learned
  • How a few small changes to petal size and spacing turn one technique into many different flowers
  • The color-and-shape combinations that let you fill an entire wall with pieces that look like a collection, not copies

For Just $47 You Get Everything

The full price of the Alcohol Ink Flower Workshop is $97. But that's not what you'll pay today.

The page you're reading right now is a beta test. I've put everything I know into this workshop, every surface trick, every timing cue, every small fix that saves a tile, and I want to be sure the people who join actually finish a flower they're proud of.

I'm honestly not sure I can give that kind of attention to more than a hundred people at once. So the first 100 students get in for a fraction of the $97 price. If this page is still live, you can get instant access to the full workshop and every bonus for just $47.

The Alcohol Ink Flower Workshop course bundle
  • The Complete Alcohol Ink Flower Workshop $97 value
  • Bonus: The Gallery-Ready Framing & Display Guide $19 value, FREE
  • Bonus: The Color Palette Library $23 value, FREE
  • Bonus: The Troubleshooting Vault $15 value, FREE
  • Bonus: The Flower Variations Pack $37 value, FREE
Total Value: $191
You Pay: $47

One-Time Purchase. Lifetime Access Forever.

Get Lifetime Access to the Alcohol Ink Flower Workshop Now

Lock in the reduced beta price before the first 100 spots are gone.

🔒 Secure Payment 256-bit SSL 30-Day Guarantee PayPal Visa / MasterCard
30-DAY GUARANTEE

30-Day Money Back Guarantee

You don't have to decide for sure right now. Get instant access to the full workshop, watch the videos, pour your first tile. If at any point in the next 30 days you decide it isn't for you, for any reason at all, just send a quick email and you'll get every penny back within 24 hours. No questions asked. No hoops. No awkward conversation. You either love what you make or you get a full refund. That's it.

Frequently Asked Questions

None at all. This workshop is built specifically for complete beginners. Every step is demonstrated up close and in order, so you're never guessing what to do next. Plenty of students come in convinced they have zero artistic ability, and they paint a flower they're proud of on the very first afternoon.

Almost nothing, which is part of the appeal. No easel, no kiln, no special room. The whole setup fits on a corner of the kitchen table and packs into a shoebox. For your first flower you'll need a few colors of alcohol ink, a 6x6 inch smooth white ceramic tile, 91% isopropyl alcohol, an artist's air bulb, an N95 mask, a white gel pen (a fine .08 tip), and a spray sealer, plus a plastic tablecloth (the ink stains surfaces), nitrile gloves, and an old shirt or apron. Everything's easy to find on Amazon or at Michael's or Hobby Lobby, and the course includes the complete supply list. Most people get started for around $40 to $50, and the tile, air bulb, and gel pen are reusable for every flower after that.

One important note on safety. Isopropyl alcohol and the ink fumes are strong, so always work in an open, well-ventilated space: an open garage, a back patio, or a craft room with the window open and a box fan in the window. I take this seriously in my own studio, where I use a fume extractor, a box fan, a filtered mask, and safety goggles, and I've even had an allergic reaction to the fumes myself. Please don't skip the ventilation. I'll walk you through the simple setup inside.

The video content runs a few hours, and most students paint their first flower in a single relaxed afternoon. The tile then needs a few quiet days to cure before you seal it (two to three days, then a couple more after sealing), so your finished, framed piece is ready about a week out. Almost none of that is hands-on, it's just drying time. There's no schedule and no rush, and you can pause any time and pick up where you left off.

Yes. One hundred percent a one-time payment of $47. No subscriptions, no hidden fees, no recurring charges, and no upgrade waiting on the other side. You pay once and you own access to the whole workshop and every bonus permanently.

You're covered by a full 30-day money-back guarantee. If you're not happy for any reason at all, send one email and you'll receive a complete refund within 24 hours. No questions asked.

Forever. This is lifetime access. Watch it once, watch it ten times. It's yours permanently, and if I ever add new content you get that too at no extra charge.

Yes. The whole point of the workshop is to walk you through it step by step so you can make something beautiful on your own, at your own table. No artistic talent required, just a willingness to follow along.

Clear, close-up video lessons you can watch on any device, phone, tablet, or computer. Every step is shown in real time so you can follow along as you work, at whatever pace suits you.

Free tutorials show bits and pieces, a clip of one step here, a different approach there, with nothing connecting them. This is a complete, ordered system that takes you from a blank tile to a finished flower, with the reasons behind every move so you know what to do when something looks off. No guessing, no gaps, no stitching together five creators who all teach it differently.

Completely. Checkout runs through a secure, SSL-encrypted page using trusted processors including PayPal, Visa, and Mastercard. Your financial details are never stored on our servers. It's the same level of security you'd expect buying from any major retailer.

Right away. You get instant access to everything the moment you join, so you can watch the first module tonight and pour your first tile this weekend.

Ready to Make Your First Alcohol Ink Flower?

I still remember my first good flower. I'd made a whole stack of muddy ones, and then one afternoon by that kitchen window the ink finally did what it was supposed to, and I just sat there grinning at a wet tile. I'd love for you to skip the muddy stack and get straight to that grin. That's the whole reason I made this.

Margot H.

One-Time Purchase. Lifetime Access Forever.

$97 $47
Get Lifetime Access to the Alcohol Ink Flower Workshop Now

Lock in the reduced beta price before the first 100 spots are gone.

🔒 Secure Payment 256-bit SSL 30-Day Guarantee PayPal Visa / MasterCard